How to Create Custom Embroidery Designs Using the Peony Embroidery Machine
Creating custom embroidery designs has become easier and more efficient with modern computerized embroidery machines. The Peony embroidery machine is designed to help beginners, boutique owners, and professionals bring creative ideas to life with precision and consistency. This guide explains the complete process of creating custom embroidery designs using the Peony embroidery machine, from concept to final stitching. Embroidery Machines for Home
Understanding Custom Embroidery Design Creation
Custom embroidery design creation involves converting artwork, text, or patterns into a digital embroidery file that the machine can read and stitch accurately. Unlike ready-made designs, custom embroidery allows you to personalize logos, names, motifs, and decorative elements based on your exact requirements.
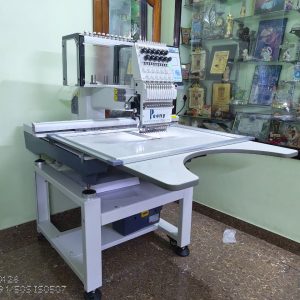
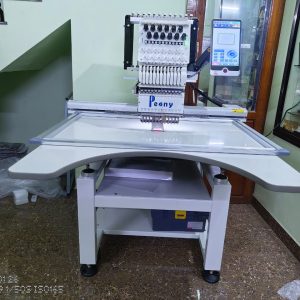
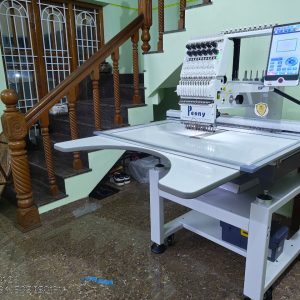
The Peony embroidery machine supports computerized design input, making it suitable for detailed and professional embroidery work.
Step 1: Planning Your Embroidery Design
Before starting the machine, proper planning is essential.
Begin by deciding:
The type of design (logo, text, floral, decorative, or artwork)
Fabric type (cotton, silk, denim, polyester, etc.)
Embroidery size and placement
Thread colors and stitch density
Good planning helps avoid fabric damage, thread breaks, and uneven embroidery results.
Step 2: Creating or Choosing Digital Artwork
Your embroidery design starts as a digital image or text. You can:
Create artwork using graphic design software
Scan a hand-drawn design
Use vector files like JPG, PNG, or SVG formats
Simple, clean designs work best for embroidery. Avoid excessive fine details, as embroidery stitches have physical limitations compared to printed graphics.
Step 3: Digitizing the Design for Peony Embroidery Machine
Digitizing is the process of converting artwork into embroidery stitches. This step is crucial for achieving clean and professional results.
Using embroidery digitizing software:
Assign stitch types (satin, fill, running stitch)
Set stitch direction and density
Adjust underlay stitches for fabric stability
Define thread color sequence
Once digitized, save the design in a format compatible with the Peony embroidery machine.
Step 4: Transferring the Design to the Machine
After digitizing, transfer the embroidery file to the Peony embroidery machine using:
USB drive
Direct cable connection (if supported)
Ensure the file loads correctly and preview the design on the machine screen. Check for any missing elements or incorrect stitch paths before starting embroidery.
Step 5: Preparing Fabric and Hoop Setup
Proper fabric preparation is key to flawless embroidery.
Steps include:
Choose the correct embroidery hoop size
Attach suitable stabilizer (tear-away, cut-away, or wash-away)
Place fabric evenly without wrinkles
Secure fabric tightly in the hoop
Correct hooping prevents design distortion and thread misalignment.
Step 6: Setting Up the Peony Embroidery Machine
Before stitching:
Select the uploaded design
Adjust embroidery speed based on fabric
Confirm thread colors and needle position
Set embroidery area boundaries
The Peony embroidery machine allows precise control, making it easier to customize settings for different fabrics and designs.
Step 7: Test Stitching for Accuracy
Always perform a test stitch on scrap fabric before final embroidery.
Test stitching helps:
Check stitch density
Confirm thread tension
Identify trimming or alignment issues
Ensure color sequence accuracy
Making adjustments at this stage saves time and materials.
Step 8: Start the Embroidery Process
Once everything is set, start the embroidery process. Monitor the machine during stitching to:
Detect thread breaks early
Replace thread colors smoothly
Ensure fabric remains stable in the hoop
The Peony embroidery machine handles complex designs efficiently, delivering consistent stitch quality.
Step 9: Finishing the Embroidery
After embroidery is complete:
Remove the hoop carefully
Trim excess threads
Remove stabilizer neatly
Press the fabric lightly if required
Proper finishing enhances the overall look and durability of the embroidery.
Tips for Better Custom Embroidery Results
Use high-quality embroidery threads for smoother stitches
Match stabilizer type to fabric weight
Avoid overcrowding stitches
Maintain regular machine cleaning and oiling
Save design backups for future use
These practices ensure professional-quality embroidery and longer machine life.
Who Can Benefit from Custom Embroidery Using Peony Machine?
Tailoring shops
Boutique owners
Fashion designers
Home-based embroidery businesses
Corporate branding and uniform suppliers
Custom embroidery adds value, branding appeal, and personalization to garments and accessories.
Conclusion
Creating custom embroidery designs using the Peony embroidery machine is a systematic process that combines creativity with technology. From planning and digitizing to stitching and finishing, each step plays a vital role in achieving high-quality results. With proper practice, the Peony embroidery machine enables you to produce professional, customized embroidery suitable for both personal and commercial use.
0 Comments